As an Amazon Associate, this site earns commissions from qualifying purchases. For more information click here.
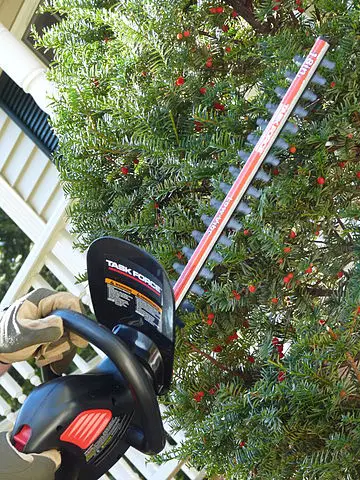
Hedge trimmer blades are made to cut evenly and quickly. If you are seeing ragged results or the blade does not cut at all, you have to do some checking and fixing. Usually the problem has to do with the blades themselves, but in certain situations, it could be due to the gears.
Hedge trimmer blades need to be sharpened every 50 hours, otherwise they get dull and have difficulty cutting. Another reason could be the blades are covered with dirt or misaligned. You can realign the blades by using the handle of a screwdriver as a pry bar.
Blades are Dull
This is the simplest and most likely explanation. Blades wear out especially if they run into twigs, small rocks and other materials. If you are getting ragged cuts it means the blades have to be sharpened.
How to fix. Sharpen the blades and the tool should cut like before. There are a lot of options but a file sharpener such as the SHARPAL103N will be fine.
Remove the blade. Hold the file sharpener with one hand use a swift stoke, from the bottom to the cutting tip.
When you get to the edge, lift the file sharpener and place it back down on the bottom edge. Do not use a back and forth motion; one stroke to the cutting edge, lift the file, bring it down to the bottom, stroke to the edge, repeat.
Hedge trimmer blades come ready to use, but after 50 hours can turn dull. Of course your mileage may vary depending on how often you use it. This could also be one of the reasons why your hedge trimmer is bogging down.
Blades are Not Aligned
These blades sometimes get out of alignment. Your hedge trimmer might have run into some large rocks or branches, or cutting through thick wood can cause this too. If you installed new blades, they may not have been aligned correctly.
How to fix it. Put on safety glasses and gloves. Press the two blades together and realign them. Your hands should be enough to reposition the blades. You can use a screwdriver handle as a pry bar to safeguard the blades as you move them.
Blades are Dirty
Dirt, grime and sap are going to build up at some point. Sap in particular is going to be an issue if you trim a lot of branches. Eventually, the dirt and sap are going to affect the blades’ ability to cut. Cleaning the blades regularly can prevent this from becoming a problem.
To clean a dirty or sap covered blade, you will need:
- WD 40, turpentine or other cleaning solution
- Old clothes for cleaning
- Brush
- Sponge
- Lubricant
- Soapy water (if the blade is water resistant only)
Step 1. Remove the blade from the hedge trimmer. Clean the trimmer blade area.
Step 2. If the blade is water resistant, dip an old cloth into soapy water and wipe. If you are worried about the blade rusting, skip the water and wipe the blade with a dry cloth.
Step 3. Dip another piece of cloth into WD40. Wipe the sap and other hard to remove substances and materials.
Step 4. Use another cloth to wipe the blade dry.
Step 5. Apply lubricant on the blade and let it dry. Repeat these steps for the other blade.
Switch the hedge trimmer on and let it run. Now that the blades are clean, the cuts will be sharp and even.
Blade Teeth are Broken
This is rare but it can happen if the blade hits metal or another hard object. The teeth can also bend or break if you dropped the hedge trimmer. Other than that, it is unlikely to happen unless the blade is poorly made.
If one or more blade teeth is bent or damaged, you should take the blade to a repair service or get a new blade. Putting a tooth – or more – back in place is difficult and you risk damaging the rest.
The best way to deal with this is prevention. Before hedge trimming, make sure there are no metals or other large, sharp objects on the ground.
How to Replace Hedge Trimmer Blades
Before buying a replacement, try the steps above first. It is possible the blades just need a bit of sharpening. Only buy new blades if the other fixes do not work.
If cleaning won’t do and you need to replace the blades, the process is really simple. All you need are the following and you are good to go.
What you need:
- Safety goggles
- Gloves
- New hedge trimmer blades (use the model number and brand name to find a compatible blade)
Step 1. Remove the blade from the hedge trimmer. The process varies depending on the brand, but usually you have to press a release button. If there is none, pull the blade out carefully. This will require some wiggling so be patient.
Step 2. If necessary, clean the area around the blade. Wipe away dirt, grass, sap, twigs etc.
Step 3. Install the new blade. Follow the instructions on your owner’s manual.
Step 4. Turn the hedge trimmer on and give the blades a try. See if the blades are working fine and try different settings.
Your owner’s manual provides information on how often to replace the blades. If the blades wear out much faster in your case, replace them right away. Similarly if you do not use the hedge trimmer much, those blades are going to last longer. Proper and regular maintenance are also essential to making blades last.
Gear Problems
There are times when the blades are not the problem but something else. If the blades are clean, sharp and aligned properly, the issue could be in the gears. When you run a hedge trimmer, its gears rotate so the blades can move.
How to fix it. If the gears are worn out or broken, the blades will not turn and cannot cut. If you believe there is a gear issue, inspect them immediately. If there are signs of wear or damaged teeth, replace them right away.
The following is a general overview of how to replace hedge trimmer gears. Refer to your owner’s guide for additional details.
Step 1. Use a wrench to remove the nuts, bolts and washers holding the blade and blade guard.
Step 2. Lift the gear cover off, unfastening any screws if necessary. Take out any bolts and washers, carefully placing them in a safe place. You have to put all of them back in the reverse order you took them off.
Step 3. Take the felt seal and lower gear off.
Step 4. Take off the blade below, the spacer plate and the higher gear. Install the new gear and keep the hole lined up with the blade support.
Step 5. Position the top blade so the cutting edge does not face the support. Put the spacer plate and the lower blade back. The cutting edge should face away from the guide.
Step 6. Install the new lower gear and position the cam so that it is aligned opposite the interior gear cam. If done right, the blades will align correctly with the gear holes.
Step 7. Keep adjusting the low gear until it is in the right position. When you are done, put the felt seal, cover and gasket back on. Put the blades and blade guards back on as well.
Blade Guards
Blade guards are supposed to keep dirt from getting into the blades, and they do a good job. But if the guard is damaged, it cannot prevent debris from spreading on the teeth.
How to fix it. You cannot fix a broken blade guard. You have to replace it. Remove the bolts holding the guard, pull it off and install a new one. This will only work if the blade teeth are not yet damaged. otherwise you have to replace those.
Your hedge trimmer may have a different set of instructions with regards to the safe guards. Check your owner’s manual if there are any additional steps required.

I love the outdoors and all the tools for maintaining gardens, yards and lawns. The only thing I am more passionate about is sharing what I know about garden and outdoor equipment.

