As an Amazon Associate, this site earns commissions from qualifying purchases. For more information click here.
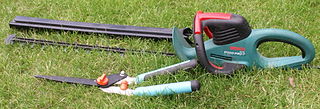
There are many reasons why a hedge trimmer blade gets jammed. Sometimes it takes a simple solution, and others require more work. This article walks you through the most common reasons why lawn edger blades get stuck and what you can do about it.
When a hedge trimmer blade refuses to move, it is often due to dirt buildup, a broken clutch or worn out gears. Lubrication and degreaser can be used to clean the blades, but if there is damage they have to be replaced.
Blade Needs Cleaning
These blades are designed for trimming, but over time get exposed to dirt, grime, dust, sap and other ground materials. Eventually the blades get clogged up and can no longer move.
This problem is easy to fix though. Turn off the hedge trimmer. Refer to your owner’s manual for how to safely remove the blades.
Once removed, wipe the dirt off with a piece of cloth. Do not use water because it could lead to rust. You can use a long, thin brush to scrape off hard to reach dirt.
Use a degreaser or lubricant instead like Andis Blade Care Plus. Once the blades are clean, put them back on the hedge trimmer and try again. The blades should move properly now. For the best results, lubricate the blades regularly.
Blades Misaligned
New blades are properly installed, but they can get misaligned with use. This can happen if branches get stuck between them or forced to cut tough, thick materials.
You can realign the blades provided they are not too far apart. To do this you need a thread locker and a screwdriver.
Put on a pair of gloves and follow safety precautions. Press the two blades together, increasing the pressure as necessary. Position the screwdriver grip between the blades. Keep applying pressure until the blades are aligned. The last step is to use the thread locker to secure the blades in their correct position.
Blade Sharpening Required
New hedge trimmer blades should last 3-4 months depending on their use, but after that they have to be sharpened every 50-60 hours. If the blades have dulled too much, they might stop moving altogether.
Sharp blades always produce clean trims. If you are getting ragged, uneven cuts, sharpening is needed. If twigs are getting stuck instead of being trimmed, the blades are not aligned properly, which is another issue.
To sharpen hedge trimmer blades, you will need:
- File sharpener
- Whetstone (the Intelitopia sharpening set is our choice)
- Lubricant
- Cleaning cloth
Step 1. Turn off the hedge trimmer and remove the blade. Press the quick release button and take the blades off. If there is not one, pry the blades off. Make sure you are wearing gloves and safety goggles.
Step 2. Use the cloth to wipe away the dirt. You can also use a brush. Do not water the blade because it could corrode the metal.
Step 3. Use a file sharpener to sharpen the blade. File towards the cutting edge. When you reach the end of the blade, raise the file. Bring the file down to the original position and stroke again towards the cutting edge.
Do not move the file back and forth on the blade. Lift it up when you reach the end of each stroke. It should only take a few strokes to sharpen the blade.
Step 4. Repeat step 3 with the other blade. Use the same number of strokes so the blades produce consistent, similar results.
Step 5. Smooth the blades with the whetstone. Apply water whenever necessary.
Step 6. When you are done sharpening, wipe the debris and dust off. Lubricate the blades, let it dry and put them back on the hedge trimmer.
Corroded Blade
A bit of rust should not prevent the blade from moving. But too much rust can, and in some cases it is best to just replace the blade. But if you want to try and remove the rust, here are some tips.
For light rust, rub a steel wool pad on the rusty area back and forth. A few strokes and that will get rid of the corrosion.
For deeply corroded blades, pour some mineral oil onto the affected part. Let it dry for 25 minutes then rub it with the steel wool pad. This is going to take more effort to remove.
If that does not work, mix one part lemon juice and two parts table salt. Dab a piece of cloth onto this mix and wipe it on the rusted blade. Apply generous amounts on the corroded parts and leave it there to dry for 2-3 hours. Afterwards, wipe the material with the wool pad.
Blade Damage and Replacement
If you cleaned the blades and they still don’t work, there could be damage. Look into the section where the blades are connected to the gear, as that is where most damage occurs.
Hedge trimmer blades should be replaced under the following circumstances:
- Damage to any part of the blades
- Old and worn out
- Bent or broken teeth
- Can no longer be sharpened
- Too much rust
- If the blades are misaligned and cannot be restored, replace them.
Check your owner’s manual for details on how to replace the blades. Modern hedge trimmers have simplified this with a quick release button. However yours might work differently so refer to the manual.
You can buy replacement blades from the manufacturer or various online stores. Make sure to note down the make and model so the replacement will be compatible.
Related. Why your hedge trimmer is not working
Broken Clutch
The clutch moves engine power to the gears, which allows the blades to turn. You can find the clutch in the crankshaft on a belt, chain or shaft.
Wear and tear may cause the clutch to slip, jamming the blades in the process. Worn out or damaged shafts have to be replaced. How you do this depends on the make and model. With some models you can use a clutch removal tool, and with others you have to disassemble some parts.
Gear Case Issues
The gear case is situated close to the blades and just under the engine. It has two purposes: first, to serve as a filter and prevent dirt from damaging any gears or slowing down their performance. Gear cases also protect the hedge trimmer user from injuries by acting as a barrier.
If the gear case is damaged, it could affect the blades’ ability to move. You can buy a new gear case and replace the old one. This should fix the blade not moving problem.
Worn Out Gears
Hedge trimmer gears are fitted with uniquely made teeth that enable the blades to move. If this component malfunctions, the blades will lose their power source.
Gear problems can cause a hedge trimmer to smoke so you should fix this as soon as possible. If you suspect this is the case, turn off the engine. Look between the blades and the gear casing. You might have to remove the blades to gain access to the gears.
Examine the gear and look for signs of damage or wear and tear. If the parts are broken or worn out, replace them and the blades should start moving again.
Gears Need Lubrication
Gears must be lubricated to move smoothly. When this runs out –as it will at some point – the blades will slow down and eventually halt. The solution is to lubricate the gearbox and give the whole thing a thorough cleaning. You will need:
- Allen wrench
- White lithium grease or other metal lubricant
Step 1. Remove the blades using the wrench. If the blades are dirty, clean them now. If the blades are dull, sharpen them with a file sharpener and whetstone. Refer to the steps in this article on how to sharpen hedge trimmer blades.
When you are done with the blades, set them aside for now, along with the nuts and bolts.
Step 2. Unfasten the gear case bolts and lift the cover. Lubricate the grease casing cover.
Step 3. If you have not done so, lubricate the blades.
Step 4. Put the blades back in as well as the gear case.
Turn the hedge trimmer on. If you put everything back correctly, the tool will restart without a problem.

I love the outdoors and all the tools for maintaining gardens, yards and lawns. The only thing I am more passionate about is sharing what I know about garden and outdoor equipment.

