As an Amazon Associate, this site earns commissions from qualifying purchases. For more information click here.
The answer to the question, “will a snow blower work on gravel?” is yes, it does work. But there are lots of snow blowers, so which one do you use? That is what you will learn here. This guide also shows step by step how to remove snow on a gravel driveway. Or any gravel surface for that matter.
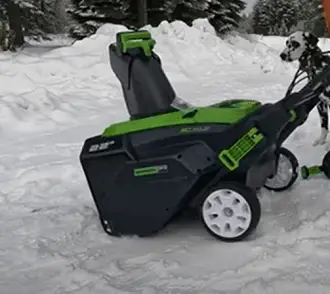
A two-stage snow blower can remove snow on gravel, but you have to set the skid shoes high so it does not remove any gravel. Only 2 and 3 stage snow blowers can be used, as one stage models scrape the surface.
What Snow Blower Should I Use?
A two-stage snow blower is the best option for most driveways. It is the most common type and also effective in removing snow without damaging the surface.
A single stage snow blower (or snow thrower) is not suitable for gravel, so we will focus on 2 and 3 stage models.
Two stage snow blowers. 2-stage snow blowers are equipped with an auger which gathers snow. The snow is sent to the blower and thrown out through a chute.
Three stage snow blowers. These are similar to two-stage models except it has an extra auger. Three-stage snow blowers are designed for large driveways and properties.
In most cases a two-stage snow blower is enough. The Sun Joe Snow Blower handles a lot of snow and doesn’t damage or displace gravel. If you are facing heavily compact snow however, a three-stage model might be worth looking into.
How to Adjust the Skid Shoes
In the next section you will learn step by step how to snow blow on gravel. But before you do that, you have to adjust the skid shoes.
The skid shoes are the metal parts under the blower. These shoes are set low on paved surfaces, but for gravel these have to be raised up. This is necessary to avoid any damage or displacement.
You need a piece of wood about an inch thick. This is where you are going to place the scraper bar edge. Follow these steps.
- Pump the tires to the manufacturer recommended PSI.
- Place the snow blower on an even surface.
- Place a 1 inch wood in front of the snow blower.
- Position the scraper bar on the wood.
- Use a wrench to loosen the bolts on the shoes.
- Bring the skids down and tighten them.
- Take the wood off. The snow blower should be balanced even if you move side to side. If it wobbles, check the bolts.
This video shows you how it works.
How to Snow Blow on Gravel
Preparing your snow blower is a must, as you don’t want to experience a surge while blowing snow on your driveway. That is why you had to adjust the skid shoes first. Now you can start clearing your driveway.
Step 1
Pick a spot where the chute will throw the snow. The PowerSmart Snow Blower can throw snow up to 50 feet, but you have to pick a spot that is far from the driveway as possible. You might have to adjust the chute settings to get it to throw the distance you want.
All that snow turns to water in springtime so pick a location with drainage. Be mindful of the distance too. You want to throw the snow farthest from your driveway, but make certain it doesn’t end up in your neighbor’s property.
Step 2
Prepare the snow blower. Adjust the skid shoes following the directions given earlier. Now take note of the following.
Pour fresh fuel into the tank if needed. Use whatever fuel type the manufacturer recommends. If you recently used the blower, wait for the engine to cool down before adding fuel.
Add Seafoam to stabilize the fuel. This is necessary to prevent freezing. Do this only if the
temperature is very low.
Step 3
Move your car out of the driveway so it doesn’t block your movement. Remove any debris on the walkway that isn’t snow. You don’t want plastic, twigs, and other stuff clogging the snow blower. To be specific, clear debris from your door to the walkway.
Step 4
Turn your snow blower on. You have two options:
if you don’t feel any wind, position the snow blower in the middle of your driveway. Direct the nozzle to the yard. Push the snow blower outwards in circles.
If there is wind, point the blower where the wind is blowing. Move the blower in that direction while going side to side. You might have to adjust the chute direction to keep it pointed towards where the wind is coming from.
Just keep going until you clear the driveway. Unless the snow is really packed and heavy, you don’t have to worry about unclogging the chute.
Step 5
In many cases a snow blower can remove most if not all the snow on gravel. If there is snow stuck in hard to reach spots, clear it up with a shovel. In other words, let the snow blower do the heavy clearing and finish it off with a shovel or similar tool.
When Should You Clear Snow on Gravel?
The best time to start snow blowing when the snow is less than 6 inches. Even if it is still snowing you should begin.
Yes, falling snow gets in the way and adds to the pile you have to clear. But it offers more benefits.
It is easier to move the blower because there is less snow around it.
You can throw a lot of snow and clear the area faster. Even if flakes fall, you will still get a lot more work done.
The fewer the snow, the less stress on the engine. Your snow blower will carry a smaller load and use less fuel to move around.
There is a smaller chance of snow getting stuck on the gravel. When you let snow accumulate, it increases the risk of some getting stuck in hard to reach areas. Clearing early reduces this possibility.
Of course if you have a powerful snow blower, you can do this anytime. If the machine can handle 15 inches or more of snow, you can wait for the weather to clear before starting. With that kind of power you don’t have to worry about overworking the engine.
Another factor is safety. How much snow is falling out there? If it less than 6 inches and just falling lightly, you can start clearing. If there is a blizzard and very cold, you might want to wait it out. It depends on how powerful your blower is and the safety conditions.
Safety Precautions
Clearing snow in freezing temperature always carries some risk. Follow these steps to protect yourself and those around you.
Clear the area of people and pets. Tell everyone in your home, especially if there are children, to stay away from the snow blower. Keep them away from the area where you will throw the snow too. If you have pets, move them inside until you are done.
Do not wear loose clothing. Put on multiple layers of cloth to keep you warm and safe. Your attire must b tight fitting so it doesn’t get caught up in the machine.
Never leave a snow blower on unattended. Shut it off if you have to leave even for a few minutes. Once you are done clearing, clean the chute and wipe the snow blower. Turn it off and wait for the engine to cool down before putting it back in storage.
Do not turn a gas snow blower in an enclosed location. Bring it outdoors or anywhere with good ventilation.
Never snow blow until the area has been cleared of debris. Twigs, pet toys, weeds, garden equipment, etc. have to be removed. This is important to protect yourself and the machine.
When choosing a snow blower, consider how much snow falls in your area. That will tell you what type of blower to get and what capacity.

I love the outdoors and all the tools for maintaining gardens, yards and lawns. The only thing I am more passionate about is sharing what I know about garden and outdoor equipment.

