As an Amazon Associate, this site earns commissions from qualifying purchases. For more information click here.
Does your weed wacker refuse to rev? You got the engine idling, but when you try to power it up the machine dies out. No doubt there is a problem here, but you do not have to take your weed wacker to the repair shop yet. In most cases, you can fix this issue. This guide explains the causes and how to resolve them.
If the weed wacker engine refuses to rev, it probably has something to do with the fuel. Clean or replace the fuel lines and filters, and make sure the exhaust is not clogged up. If that does not work, clean or replace the carburetor.
Important: wear goggles, gloves, thick shoes, long pants and a long sleeve shirt before proceeding. You are going to tinker with the engine of a gas-powered trimmer, so take all safety measures.
Wrong Fuel Mixture
A 2-stroke weed wacker or string trimmer typically uses a 40:1 mixture of gas and oil. With other trimmers the ratio used is 50:1 or 32:1.
if you get the mixture wrong, the engine will not rev. In most cases the engine is not even going to start. These tools are very sensitive to the gas and oil combination, and any deviation will affect performance.
Your owner’s manual states what the mix ratio should be. Follow the instructions and if you make a mistake, empty the fuel tank. Do not run the engine with the wrong mix. If you have a Husqvarna string trimmer for example, check the manual for details on the fuel ratio.
There are a couple of more things to keep in mind: replace the fuel every 30 days and use only the fuel suggested by the manufacturer.
Almost all string trimmers run on regular unleaded gas, 87 octane and 10% ethanol. You can buy this stuff online or go to a gas station. As long as the specs are right, there will be no issues.
After 30 days, replace the fuel. If you don’t, it will turn into a sticky sludge and clog the engine. You can avoid this by putting fuel stabilizer or just replacing the fuel.
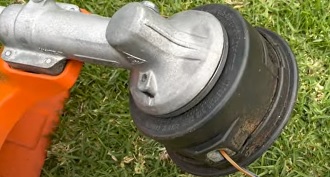
Check the Fuel Filter and Fuel Lines
Inside the fuel tank are two important parts: the fuel filter and fuel line. If any of these are clogged or damaged, your weed wacker cannot run.
A fuel line moves fuel from the tank into the engine parts. A fuel filter keeps contaminants out and ensures the gas going in the engine is clean.
Fuel filter. An engine that refuses to rev means fuel flow is being restricted. This can happen if the fuel filter is clogged. Filters keep impurities out, but dirt is going to build up. When it does, the filter can no longer keep impurities out.
To check the fuel filter, open the fuel tank. It is right there close to the fuel line. Replace the filter if it is too dirty or damaged. Follow the instructions on your owner’s manual on how to remove and replace it.
Fuel line. The fuel line sends fuel into the carburetor for mixing. When the line gets worn out, fuel will leak, limiting the flow.
To fix the fuel line, open the tank. Carefully take the line out and check for signs of wear. Replace the line if needed. Since the fuel filter and fuel lines are close to each other, it is easy to check both. It is common practice to clean or replace the fuel filter and line at the same time.
Related. 8 Reasons Your Weed Eater Only Runs on Choke
Defective Spark Plug
The spark plug produces electricity which fires up the air and fuel in the engine. It is literally the spark that drives the engine.
A defective or worn out spark plug cannot generate electricity. Without it, the fuel is not going to ignite. In most cases the engine will not start or start but not rev.
The solution is to clean or replace the spark plug. First, turn the trimmer off. Find the spark plug (location varies per model). Disconnect the spark plug boot and take out the spark plug. The Oregon spark plug tester can check if it is still working or not.
If the spark plug is covered in carbon deposits, wipe it clean. If the tips are damaged or it is too dirty, get a replacement. Weed wacker spark plugs are supposed to be replaced after every 50 hours of use. But replace it sooner if the trimmer performs poorly or has a hard time revving up
Clogged Exhaust
The exhaust and muffler get clogged with debris just like the rest of the engine. The debris make it difficult for the engine to run and results in poor performance.
To clean the exhaust you need a combustion chamber cleaner. Use the cleaner according to the instructions provided on the package.
Let the cleaning solution soak for an hour or so, depending on the instructions. Rinse everything with a pressure washer.
If the exhaust isn’t too dirty, soap and water might be enough. If it is really dirty though, you are better off with a specialized exhaust cleaner.
Damaged Primer Bulb
The primer bulb supplies the engine with fuel and is often used for cold starts. If the bulb is cracked it will no longer function.
- A broken primer bulb has to be replaced. To do this:
- Press the sides of the bulb to loosen the tabs.
- Take the bulb out. Use a crochet hook or a primer bulb removal tool to get it out.
- Put the new primer bulb in. Lock the tabs.
- String trimmers often come with a primer bulb installation tool (or you can buy one) to simplify the installation.
Clean, Adjust or Replace the Carburetor
A lot of engine problems are connected to the carburetor because it is where air and fuel are combined. Any sort of issue here is going to affect the entire trimmer.
If you suspect carburetor problems, there are three solutions: adjust, clean and rebuild or replace.
This video shows you how to adjust a carburetor:
How to clean and rebuild a carburetor
Buy a carburetor rebuild kit. You have to take the carburetor apart to clean it. The kit comes with replacement parts in case some are damaged. Plus it shows you how to put the carburetor back together.
You also need a solvent cleaning solution or one made specifically for carburetors. A cleaning brush is also required.
- Consult your manual for the carburetor location.
- Use a screwdriver to remove its cover.
- Remove the screws or nuts that hold the carburetor to the engine.
- Disconnect the fuel lines and other components attached to it.
- Take the carburetor out of its housing.
- Follow the instructions on your manual or carburetor kit on how to disassemble it.
- Dip the brush in the cleaning solution. Clean each part.
- After cleaning, wait for each part to dry.
- When dry, follow the kit instructions to rebuild it.
If the carburetor is already damaged, you have to replace it. Follow the same steps for removing it, but now you have to install a new carburetor.
Replace the Air Filter
The air filter keeps the engine free from debris, dirt, small rocks, sand and whatever else the trimmer throws up. It does a good job of this but it is going to get covered with dirt at some point. When that happens, the air filter loses its efficiency.
Air is essential to keep a weed wacker running. Lack of air is going to increase the internal temperature and lead to engine overheating. If the engine is overheating, you cannot run it at full power.
You can either clean or replace the air filter. If the filter is already old and too dirty, get a new one. They are affordable and easy to install. If the filter is still new, wipe it clean or dip in a container of soapy water.
When the filter has been cleaned, put it back on. In most cases you can remove the filter by lifting out the filter housing cover. It may or may not have screws depending on the trimmer.

I love the outdoors and all the tools for maintaining gardens, yards and lawns. The only thing I am more passionate about is sharing what I know about garden and outdoor equipment.

